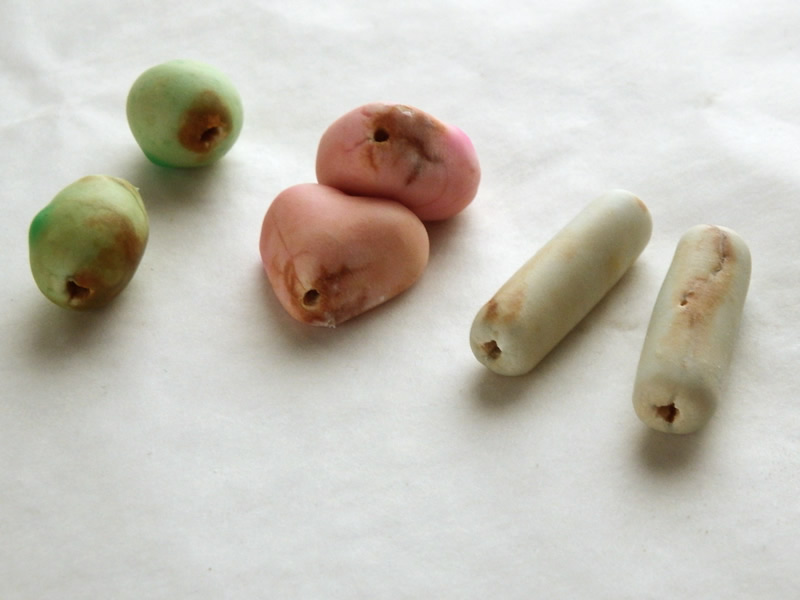
Sad to say, the photo above is the best one to come out of the session where I tried to create translucent hollow beads with Translucent Liquid Sculpey (TLS).
I had read (where exactly escapes me now) about a polymer clay artist getting better translucent effects by painting liquid Sculpey. There wasn’t any further information than that, so out come all of the supplies.
Hollow Bead Forms

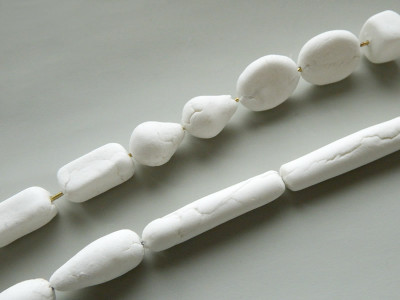
I already had cornstarch/ baking soda shapes made and ready to be covered from the last adventure, so that was a start.
All that was left to do now were the mixing alcohol inks into the clay, painting the clay onto the forms, baking and hollowing out the cores.
Color Mixing
I was excited about the possibilities for the Translucent Liquid Sculpey, but had never used it before. It seemed that adding the ink to it probably called for a light hand, the same as with regular polymer clay.

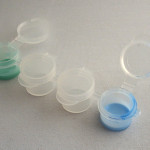
Since this was an experiment, the beads don’t have much surface area and the liquid clay comes in a 2 oz (60 ml) bottle, I rounded up some small dollar store paint containers that hold about 1/2 ounce (15 ml) or less.
That way I could mix the color in tiny amounts and keep it covered if there was any excess.
As you can see, I didn’t need more than a drop or two to color the liquid for any given color. Altogether, there was only a fraction of an ounce in each of the containers. They were about half full before the painting began, and the photo was taken after painting two layers.
Painting
Painting the cores required a delicate balance when it came to the thickness of the each layer.
Too little and it would take forever to build up the layers; too much and it makes a droplet that just hangs in space throughout the baking (and beyond).
It needs to be just enough to cover the form and helps to paint in good light, so you can tell where you painted and where you didn’t.
Baking

Package directions for the liquid clay call for 275º-300ºF (130ºC) for 15-30 minutes.
Increasing the temperature is supposed to increase the translucence. That’s the goal, but I started toward the lower end of the range, since the coats were so thin.
The beads were hung on wires suspended inside an aluminum pan and everything was covered with another aluminum pan turned upside down. This is the same setup I use for regular polymer clay.
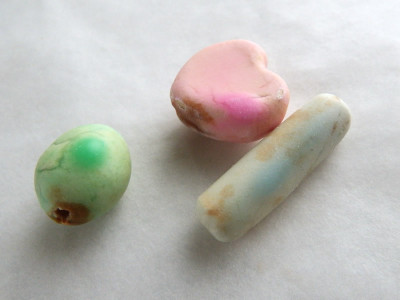
Round 1 – pink heart shape, layer 1
285º for 16 minutes – This was probably too hot. Brown spots appeared, especially at the ends where the holes are, and where the clay is thinnest.
This layer was painted too thickly. Notice the area of more vivid color, where it dripped.
Round 2 – blue tubes, layer 1
275º for 12 minutes – Not the most scientific approach to lower both the time and temperature, but I really didn’t like the look of those brown spots.
Results? Hmmm. Brown spots everywhere (mostly on the top of the piece), but at least they’re lighter colored ones. The top got the burns and the bottom got the drips. Nobody got left out.
Round 3 – green grape shape, layer 1
Even though the beads were covered throughout the process, I lowered the top rack of the oven, because of the burns on the top of the last batch. Just in case.
275º for 10 minutes – Still burnt. Still dripping. Arrrgghh!
Hollowing
Wouldn’t that be nice? But not yet.
Lessons Learned
Temperature, rather than time is allegedly the culprit when the clay burns.
Surface prep – with such thin layers, it looks like cracks need to be smoothed as much as possible before coating the piece.
Coating – take a deep breath and go easy on the paint layers – lots of thin ones. You can re-bake multiple times
At least the paint stuck to the clay, as opposed to the ballooning effect with the regular polymer clay. Ah, progress!
Next Steps
The sequel – This was a pretty frustrating night. But not liking to leave projects unfinished, there will be a follow-up. I’ll probably paint over the layers that are already there, to keep from wasting the cornstarch/baking soda cores.
Temperature control – Since the temperatures were at the minimum end of the range, and I don’t want to underbake them, it makes me question the accuracy of the oven. Looks like it’s time for an oven thermometer, like the smart people use.
Equipment switch – Looking into some of the problems with this session, there are several references to using a heat gun rather than the oven. That’ll take some digging around in the garage, but seems potentially worth it.
Another technique – after this session, I came across another technique that looks like it has some possiblities. More on that after it’s been road-tested.
 If there’s any success with the next layer(s), maybe the intro photo for the next installment will be prettier.