
Balloons can be used as a wonderful mold for making papier maché clay bowls. Their full, rounded contours, variety of sizes and shapes and their elasticity offer a wide range of possibilities for some gorgeous finished pieces.
While they do present a couple of challenges that need to be worked around, they let you make forms that you can’t otherwise get with a solid, inflexible object… especially one you’d rather not destroy trying to get the finished bowl off of it.
Why Make a Balloon Bowl?
There are probably more than enough objects lying around the house that could be used as forms for molding a bowl. They’re useful for most of the shapes you might want to make.
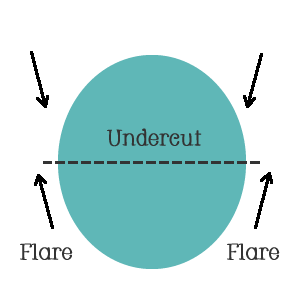 One type of shape that can’t really be created with an ordinary mold is one that has undercuts. This means that it flares out and then curves back toward the center again after the widest point.
If you do, you wouldn’t be able to get the bowl off of the mold after it was dry, without breaking the object you formed it on.
Shaping it over a balloon lets you make a bowl that does have an undercut. You can control the size, and to some extent, the shape while you’re building it. Because you can break the balloon when you’re done with it, an undercut isn’t an issue.
The Supplies 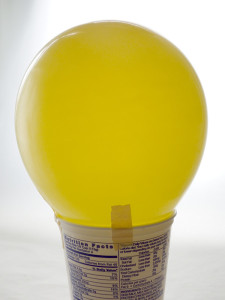
- Papier maché clay – as much or as little as you have balloons for, plus at least a couple of cups extra for patching. Get the recipe here.
- Balloons – varied sizes and shapes (or not)
- Container – with a wide enough opening to support the balloon
- Tape – masking tape works well, but anything that will hold is fine
- Putty knife or similar tool to spread clay
- A lung full of air, a balloon pump or an accomplice with a lot of hot air
The Process
Mix up a batch of papier maché clay.
Inflate a balloon to the size you’d like, leaving a little “squishiness” (in other words, don’t overinflate it).
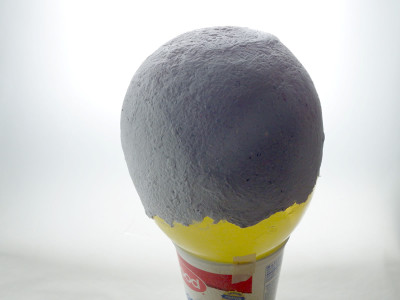
Turn the balloon upside down (tied narrow end inside) on top of the container and tape it to the rim in several places. You’ll want this to be as stable as possible.
Using the putty knife, spread a nice, thickish layer as evenly as possible over the top of the overturned balloon.
You can bring the clay down as far on the form as you’d like, so your vessel will have a narrow neck.
Thicken the area that will eventually be the foot of the bowl. The one downside to a balloon bowl is that it takes a bit of work to have it sit well. Having a thick base gives you more options for working around this.
While you’re working, check for holes in the surface of the clay. Contrast between a brightly colored balloon and the gray of the clay helps in this step.
Let it sit to dry for about a day. While the clay is still damp and somewhat flexible, turn it over and press the bottom down on a flat surface, to flatten it a bit. Then put it back on the container with the bottom up, as before.
Some alternatives for a functional foot include sanding after you’ve unmolded the bowl, forming a foot that you can attach after the clay is dry or partially dry or adding several small feet.
Unmolding
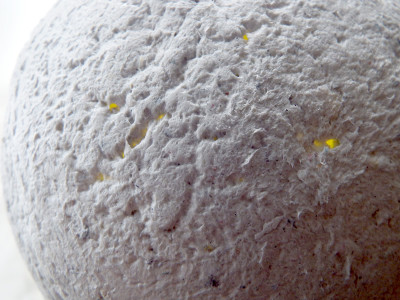 When the bowl is completely dry, it’s time to check to see if it needs patching or to try out that alternative foot/feet you had in mind. This may take a few days, depending on the humidity.
Due to shrinking while it dries or a layer that’s too thin, you may find pinholes or cracks in the clay. That’s what the extra you saved is for.
Smooth it on the same way you did with the first layer. Only this time you don’t have such a moving target.
Drying after patching is usually faster than the first time around, but the wet clay can distort the shape of the bowl. Leaving it on the balloon can help it keep its figure.
Let the bowl dry completely (again… I know, I know) before taking it off the mold.
When you decide the moment has come, you can pop the balloon or try to pull it out, gently. It will probably be slightly deflated after a couple of days, anyway.
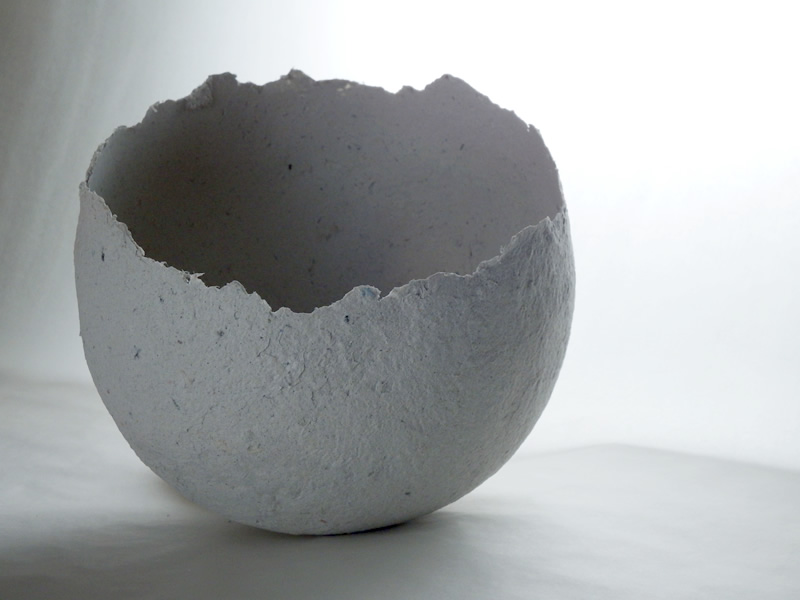
Now you’ve got a lightweight, sturdy, beautiful bowl. It can be sanded or left with the rougher texture of the clay, gessoed, painted, decoupaged… you name it.
Unfinished, if it gets wet, its contours will become distorted. (Although, if you wanted to reshape it into something other than round or oval, that distortion could lead to interesting results.)
If you use a finish that’s acrylic-based, it’ll be somewhat water-resistant. You can wipe it with a damp cloth. With enough coats, you can also briefly rinse it under water, if you dry it quickly.
Give it a try. It’s easy, fun, not very time-consuming and rewarding when you see your completed bowl.