Since there are some substantial changes from the recipe on ultimatepapermache.com in the paper prep, mixing and molding the form with the new papier maché clay mixture, I put the entire process here. It includes my recipe from an earlier post, so you won’t need to jump all over to follow it.
Paper Prep
Cover your area – this gets messy. You can use a dollar store party tablecloth, an old shower curtain, some newspapers, a tarp… you get the idea. Waterproof is probably the easiest for cleanup, though.
1. Tear it or shred it – the paper will break up more easily if it’s in 1″ or smaller pieces
2. Soak it – overnight. You can make up more than you need and store it for a fairly long time in an airtight container. I left some for a month and it wasn’t moldy at all.
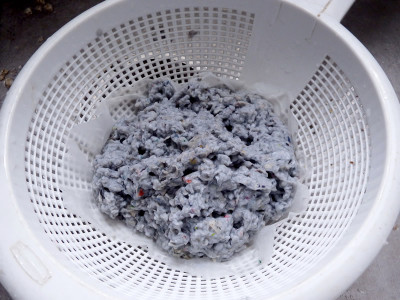
3. Beat it, just beat it – pull up a chair, attach the paint mixer to the drill and use that tool for all it’s worth. Think of it as a meditation practice. The longer you do it, the smoother the pulp and the less sanding you’ll need to do later. More water makes it easier on you and on the drill motor.
4. Strain it – you can run it through a piece of window screen, or through a strainer with something like a coffee filter over it. Some of the paper slurry can be pretty fine and escape down your drain if you’ve done your part in the last step.
5. Squeeze it – so that it holds it shape, more or less, but isn’t dripping and isn’t squeezed so dry that it is lumpy/crumbly instead of a smooth-ish ball.
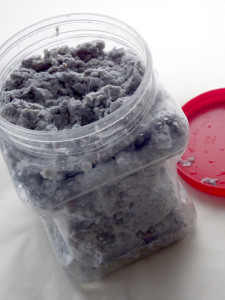
6. Store it – if you won’t use all of it right away, store it in an airtight container. This was about a 64 ounce jar.
If you think it’ll sit for awhile, add some bleach to the mix. I added about an ounce or two to 1/2 gallon container. If it smells like a swimming pool, you should be fine.
All of this only takes a couple of minutes. If you’re ready to make clay, just add what the recipe calls for to a bucket and know that you’ll be able to use your paint mixer again.
Make the Clay
Tools/Supplies
- Large bucket
- Drill with paint mixer attachment : ) or dedicated hand mixer.
- Tarp or protective covering for the floor
- Measuring cups and spoons
I wouldn’t use the hand mixer and measuring spoons on this clay then mix a cake with it. You can probably get a really inexpensive mixer at a 2nd hand store, on craigslist or at a yard sale. The measuring cups and spoons are definitely a dollar store purchase.
Ingredients
- 2-1/2 cups wet scrap paper, torn into small pieces (1″ square or smaller)
- 1 cup joint compound (not DAP, per ultimatepapermache.com)
- 3/4 cup Elmer’s Glue-All (PVA glue)
- 1/2 cup flour
- 2 tablespoons baby oil
The Clay-making Process
This slideshow will give you a quick peek at the steps.
1. Gather your tools and ingredients onto your protective cover.
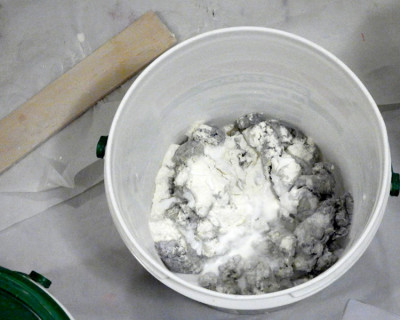
2. Add the ingredients to a bucket – all of them at once.
3. Grab a chair – and sit down next to the bucket. It’s gonna take a while.
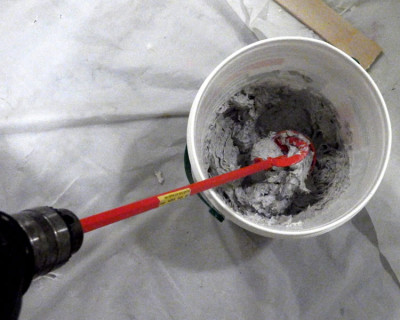
4. Mix it all up well – with the paint mixer. Keep going as long as you can stand it. It will make a finer, less lumpy clay – easier to work with and less to sand later. Get into all the nooks and crannies, cleaning out the mixer blade every so often (with something other than your fingers, and while the power is off, of course).
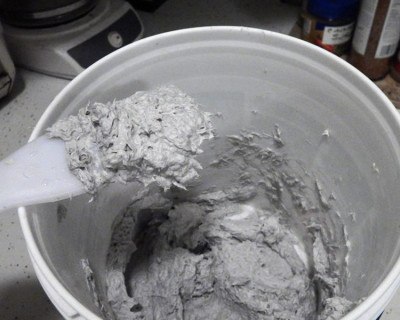
5. Store it – When it looks like really wet, gray tuna salad, it’s ready. I keep mine in the bucket I mix it in, with a lid or plastic bag over the top, so it doesn’t dry out.
Yield: This recipe can make quite a few bowls, depending on the size of the bowls you want to make. The first time I made it, it yielded enough for about 15 bowls (from ring dish to cereal bowl to mixing bowl size).
Mold the bowls
Supplies
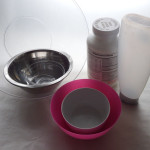
Suitable molds (read on for what makes it “suitable”), plastic wrap, a spreader (spatula, putty knife, your fingers?) other bowls, canisters or objects the wet clay-covered bowls can rest on, upside-down until dry. They need to be tall enough that the bowl won’t touch the surface the stand sits on, and narrow enough for the base of the bowl to fit over easily.
I use yeast jars/baby food jars, spray paint canisters, other molds that aren’t in use… basically anything lying around that’ll do the job. The vitamin bottle in the photo below has been used quite a bit.
Steps
1. Find some molds – choose just about any shape that appeals to you, but there are a few considerations when you’re looking for one that will be successful:
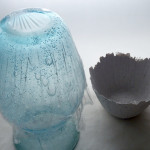
Undercuts – When you mold a bowl, an undercut (narrower area after a broader width) won’t let you get the mold out of the dried bowl without destroying one or the other.
You could still use a mold with an undercut, but stop short of the point it starts to turn inward again. Notice the bowl in the photo to the left. You would stop spreading the clay before it reached the spot where the vase turns in toward the narrowness of the neck.
If a shape with an undercut is something you’re dying to try, consider making a balloon bowl. [link here]
Overall size – Do you have enough clay?
Surface texture – any texture on the outside of the mold will be the texture you get on the inside of your bowl.
General shape – I’ve had more success with rounder shapes than squarer ones. I tried everything I could think of first, but had to tear a bowl I made away from a tall squared glass vase.
I’m not sure why, but when I try another one (oh yes, stubborn runs in the family), I’m thinking a 1/2 gallon juice carton might work. It’s waxed and it, rather than the bowl, can be torn apart.
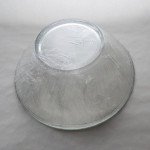
2. Cover the mold – turn the bowl upside-down and carefully place plastic wrap over it. Start at the bowl’s foot and work toward the rim, trying to keep it as smooth as possible.
You can cut (from base to rim vertically) and overlap pieces to make it smoother. Wrinkles in the wrap mean wrinkles in the bowl. Then tuck the ends under, toward the inside of the bowl.
3. Apply the clay – spread a nice, fairly thick layer all around the mold, starting at the top (foot of the bowl).
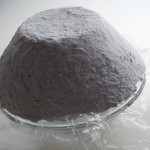
If the mixture is spread too thickly, gravity may shift it slowly toward the bottom (rim). Just skim some off the bottom and patch anywhere at the top that looks thinned.
If it’s spread too thinly, you’ll have pinholes and weak spots that you can patch easily later. Applying this takes some getting used to, but you’ll be frosting and feathering like a pro in no time. If you’ve ever spackled before painting a room, you’re ahead of the game.
Be careful not to tuck the clay under the bottom (rim) edge. If you do, you’ll have to break the overhang off when it dries to get the mold out.
4. Repeat with as many other molds as the clay will make, setting aside at least one “bowl’s worth” for patching. If you run out while patching, at least you know how quick, easy and fun it is to make more.
5. Let it dry – this may take a couple of days, depending on the temperature and humidity. If it feels colder than a piece of paper, it’s not dry yet.
6. Unmold the bowl – time for a drum roll. This is the moment you’ve been waiting for. Be gentle and take your time. Most bowls will come off easily, but some need nudging. try sliding a thin blade, like a palette knife between the bowl and the mold to check for stuck spots.
7. Check for pinholes and weak spots – hold the bowl up to a window or light and look for areas that are less opaque than the rest of the bowl.
Post-production
1. Patch it up – if you find weak areas, and you most likely will, they’ll need to be patched with what you set aside when you made the papier maché clay.
To learn more about patching with the clay, read Patching Papier Maché Clay Bowls.
2. Let it dry again – the patched areas dry much more quickly than the freshly-made bowl.
3. Sand it – There are probably some areas that are rough, have too much clay or are wrinkled from the plastic wrap. You can sand by hand, use a multifunction tool with a sanding attachment or a hand sander.
Some smaller interior areas can be a challenge to get to. That’s where the hand sanding and multifunction head can help you out. Be careful, though. I did a nice job of abrading my knuckles on one (it’s that stubbornness thing again).
4. Decorate it – (I could call this the fun part, but I really enjoy the other parts too)
There are so many ways you can add visual interest to the bowls. Pretty much anything that works on paper should work on the dried papier maché clay. As I wrote “dried…”, it occured to me that working colors, objects or texture into the wet surface has interesting possibilities, too.
I’ve used acrylic paint, tissue paper découpaged with acrylic medium, foil papers, beads, chalk paint, alcohol ink and Pearl-Ex powder, to name a few.
One helpful step to take is to use some of the extra patching clay to make as large a flat sheet as possible. Spread it on some plasticized paper, like cereal box liners or freezer paper, smoothing it out as best you can. When it’s dry, you can test decorative finish ideas on it without endangering your bowls.
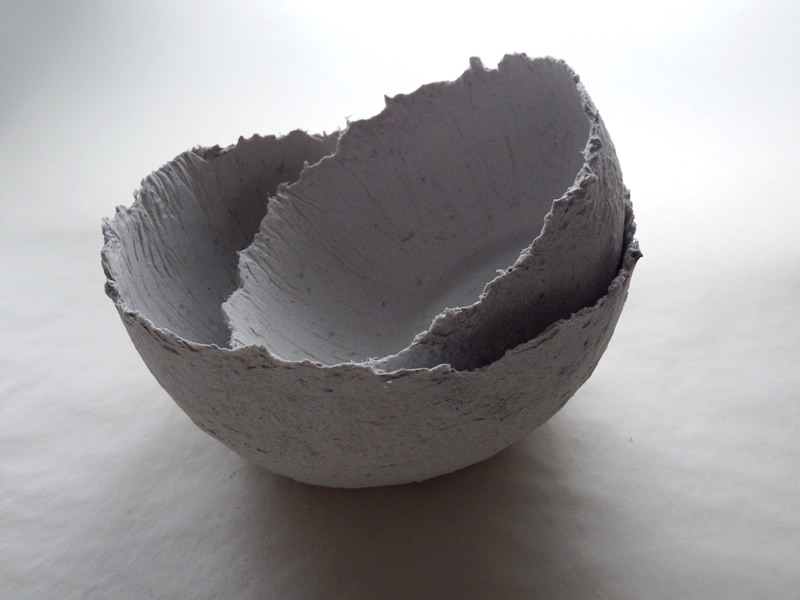
I love this recipe and now use it rather than the paper-only casting process. It’s strong but lightweight

